Training Manual

Student Training Manual

Overview

Welcome to New Orleans Shaolin!

Enclosed in this document are some materials to assist you in your introduction to the kwoon, or school. You will find the school rules, training tips, information on rank advancement, tournaments, and information on all of the school programs. This manual will probably be updated regularly, so we hope you will refer to it often. We encourage you to keep a journal for yourself wherein you can keep notes on your training, your forms, and to set and track your goals. 

At New Orleans Shaolin, we teach an art called Shaolin-Do, or “the way of Shaolin”. Shaolin-Do is more than a martial art. It is a path. It follows a 1500 year old trail all the way back to the original Shaolin temples of China. The monks at these temples learned to incorporate martial arts into their spiritual training only so they could maintain their way of life uninhibited by violent outsiders. It is not merely a way of fighting but a path to the mastery of life. Tournaments and ranking are not emphasized in this style, though both exist within it. Our founder Grandmaster Sin Kwang The’ teaches health, longevity and appreciation of life. As we like to say, being an excellent fighter and being capable of defending your family and loved ones is just one of the benefits. The practice is the goal.

Mission

To preserve and embody the mental and physical practices of the Shaolin temples.

A Brief History of Shaolin-Do

Shaolin-Do is the original blend of hard and soft fighting arts. It doesn’t rely only on body rigidity to develop power like Karate, but instead generates force from natural body mechanics and circular movements. Shaolin-Do, however, is more than just a fighting art; it is a way of perfecting oneself. By attempting to master these ancient styles of fighting, we actually come closer to mastering ourselves. This happens as you are learning to make your body perform tasks and postures that it has never attempted before, your mind begins to realize that you can do anything and this wonderful idea pervades every aspect of your life! This is not to imply that after you have trained with Shaolin-Do for a time that you will be able to do anything! The key is that you will feel that you can and you will leave fear of failure behind and put your best effort into everything you want to do in life.

The ancient Chinese observed the diverse fighting strategies of the animal kingdom, and realized that like animals, people also required fighting techniques suited to their unique physical statures. Thus the animal fighting systems were born. Some of the animal-based forms taught in Shaolin-Do have been passed down for up to two thousand years. Different animal styles were developed by different monks hundreds of years ago and those monks practiced in different provinces throughout China. Some systems came from Hunan province, from Hua and Er-Mei mountains, and from Wu Tang mountain and Fukien Province. All were included in the Shaolin Temple Systems. Our program is rich with material and diversity, enough to fascinate and challenge the individual for a lifetime!

Throughout history, the Shaolin monks have been the most feared fighters in Asia, but even more famous is their love of peace, virtue and honor. The long standing history of Shaolin temples and their famous reputation of amazing feats of fighting, flexibility, and longevity can be attributed to an ability to train not only deadly fighters, but masters of life.

Important Names in our History

  • Hua To (141-208 A.D.) – One of the most famous early physicians of China, Hua To was the first human to use sutures as well as anesthetics made from herbs during surgery. His importance for Shaolin came from his observations of the movements and spirits of five different animals. From the Bear, Deer, Bird, Tiger and Monkey he developed exercises that served to strengthen and invigorate the organs, increase circulation, tone the muscles and increase overall energy. This regimen was famous for its health promoting properties, but is little known today. Hua To was unfortunately imprisoned after operating on an Emperor. He saved the Emperor’s life but was imprisoned because of his knowledge of the Emperor’s mortality. 
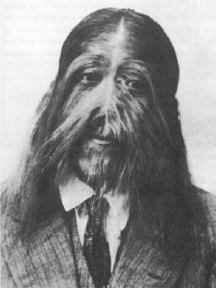
  • Da Mo (440-528 A.D.) – the legendary founder of Shaolin martial arts as well as being the first Ch’an (Zen) Buddhist patriarch of China. Due in part to his influence, the number of Buddhist temples in China grew from 2,000 to 30,000 over a period of fifty years. Also known as the Bodhidharma or Daruma, Da Mo spent nine years in meditation facing a cave wall on Shaoshih peak of Mount Sung (this is actually where he was buried.) Although this was not an uncommon practice in Buddhism, this level of dedication was uncommon. During his meditation, he was bothered by occasional drowsiness and there is a myth that says he became so angry that he finally cut his eyelids off to keep from sleeping. He tossed his eyelids aside and from them a tea plant grew. After that monks would drink tea to stay awake during long meditations. For this reason, Da Mo is always painted without eyelids. After his long meditation he presented a two-fold plan for the Shaolin monks. This plan would train the physical as well as spiritual side. The spiritual training would come to be known as Ch’an or Zen Buddhism. This was a blend of Buddhist as well as Taoist philosophy. Its main premise stressed that the Buddha was within you and to look elsewhere for the Buddha was to miss it. They only needed teachers to offer guidance toward the answers that were within them. The physical training aimed at transforming the body into a strong and pure environment in which one could pursue the ultimate questions of the Ch’an training. Da Mo introduced the I Chin Ching, or Tendon Changing Foundations. Since Da Mo was from India, the postures in this set looked very similar to yoga. These are the foundation for Shaolin martial arts and the same postures that we still practice today. (More on these below.)

Shaolin-Do Lineage – see Our Story on the website for more info

  • Su Kong Tai Djin (1849-1928) – Great Great Grandmaster Su Kong was born in China’s Fujian province. He was raised in the temple there, but traveled to all of the other Shaolin monasteries throughout his lifetime. He never lived outside of the Shaolin system and eventually became the Grandmaster of the Fujian temple. Grandmaster Su had a vast knowledge of Shaolin and mastered the art forms of all of the Shaolin temples in China. Along with other senior masters, he destroyed the Fujian temple before the government could do the same and retreated from society for the rest of his days. He was a legendary Shaolin master and is the founder of our system. His area of specialty was the most deadly of all arts, Tien Shieh Kung (death touch). 
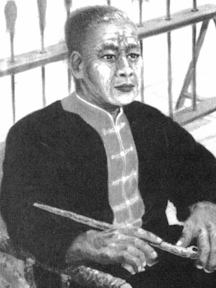
  • Ie Chang Ming (1880-1976) – Great grandmaster Ie Chang was a disciple of Grandmaster Su’s from an early age.Grandmaster Su passed all of his knowledge of the vast Shaolin system to Ie Chang Ming. This meant that Ie Chang Ming would be the new Grandmaster of the Shaolin order. He moved to Indonesia where he had to disguise the system in order to teach it. To avoid the loss of their own culture as a result of Chinese immigration, the Indonesian government made it illegal to teach Chinese arts. Grandmaster Ie added the Japanese sounding “DO” to the name of Shaolin and adopted a Japanese style gi and belt system for his students.  Great Grandmaster Ie Chang Ming was master of many arts, but his personal specialty was that of Tieh Sha Chang or Iron Palm.
  • Sin Kwang The – Grandmaster Sin b
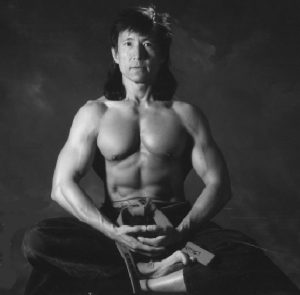
egan studying with Grandmaster Ie Chang at the age of seven. He studied eight hours a day, seven days a week until he was awarded the title of Grandmaster at the age of twenty-five, becoming the youngest Grandmaster on record in 1968. He left Indonesia and moved to Lexington Kentucky where he attended school and received a degree in mechanical engineering. He pursued a Master Degree in nuclear physics, but stopped to teach Shaolin-Do full time. Since then, he has taught full-time producing thousands of black belts, with many students having stayed with him for more than 40 years. 

New Orleans Shaolin Connection

  • Elder Master Joe Schaefer – 8th degree black belt. Holds a doctorate in Neurophysiology from University of Texas in Austin. Began training Shaolin Kung Fu in 1984 and opened his first Shaolin-Do school in 1987. He still owns and operates the Shaolin-Do school in Austin. He currently trains directly under Grandmaster Sin The.
  • Sifu Joseph Meissner – Founder and Head Instructor of New Orleans
    Shaolin, Joseph is a fourth degree black belt who has been teaching Shaolin-Do since 1997. He holds a bachelor’s degree in Theatre, Speech, 
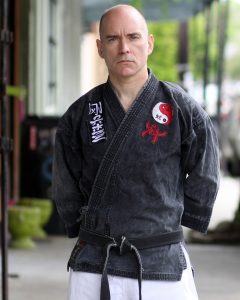
and Dance from Brown University and has completed graduate work in creative writing at UNO. He studied under 8th degree Elder Master Joe Schaefer of Austin, TX and has taken many classes directly from Grandmaster Sin Kwang The’ and other senior masters. His instructional approach is patient and inspirational, fostering a supportive, non-competitive atmosphere as he challenges each student to surpass his or her goals and aspirations. He currently resides in Los Angeles, California.
  • Sifu Sam Killpack – 3rd Degree Black Belt, Senior Instructor, and current owner of New Orleans Shaolin. He be
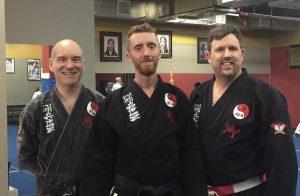
    gan studying under Sifu Joseph Meissner when he moved to New Orleans in 2010. He has a degree in Software Engineering and works as a computer programmer.
  • Sifu Brian Adams (below center) – 3rd Degree Black Belt and Senior Instructor at New Orleans Shaolin. He began his Shaolin-Do studies in 1999 under Sifu Miles Thomas at UC San Diego where he earned his B.S. in biology. He came to New Orleans and studied under Sifu Joseph Meissner beginning in 2005. He currently owns and operates Cypress Fitness, a mobility and strength gym.

Great Grandmaster Ie Chang Ming’s Rules for Shaolin-Do

The following list contains the rules of conduct for our Shaolin-Do system. They were passed from Great Grandmaster Ie Chang Ming to Grandmaster Sin Kwang The. 

  • Obey the rules of society.
  • Demonstrate excellent martial art spirit.
  • Respect elders and honor friends.
  • Be kind and love others.
  • Show good faith to others and keep their trust.
  • Support the weak and aid the needy.
  • Demonstrate good conduct and excellent learning spirit.
  • Cultivate the body and nourish the spirit.
  • Be disciplined, be generous, be honest, be loyal and give forgiveness.
  • Be alert, be wise, be open minded and be patient.

Rules for the Kwoon

Your general motivation is always to be concerned with your classmates’ safety above your own.  Show respect and appreciation for your classmates and instructors at all times.

The Facility

Treat it with respect please, and follow these guidelines at all times.

Arriving

The school opens 10 minutes before the scheduled class unless otherwise noted.  Please do not arrive earlier.  Once the school is open, you may come any time before your class to warm up, stretch, or practice if there is available space.  Bow when stepping on the training room mats as you enter for class, and as you leave when class is over. 

Keeping the Studio Clean

  • Please throw any trash you see away and help keep equipment put away and clean.
  • No food or street shoes are permitted on the training mats. You can remove shoes and store them with your gear along the walls. 
  • Training barefoot is recommended, but if you have a need to wear shoes during training, have a special pair that you wear only on the mats. 
  • Only water is allowed on the mats. 
  • Please take your water bottles and other possessions home with you after class to avoid cluttering the school.
  • I strongly recommend that you have a reusable water bottle. Disposable plastic bottles, while sometimes necessary in a pinch, are bad for your health and terrible for the environment. They contain persistent endocrine-disrupting compounds harmful to many organisms, including humans. 

Personal Belongings

  • Leave money, jewelry and other valuables locked up as we are not responsible for lost or stolen articles.  
  • Bring all equipment in a bag to minimize clutter and lost items
  • Label your weapons so you can keep track of them
  • Please turn off any phones or other noisy electronic devices.

Health & Safety

  • Remove all jewelry before class (except for a simple wedding band).  Do not wear: watches, bracelets, necklaces, earrings, or rings with settings.  
  • Keep all fingernails and toenails trimmed. NO EXCEPTIONS! Anything beyond the end of the finger is too long.
  • Bring a small towel to each class to frequently blot your face and hair. Sweat on the gym floor can be hazardous and please wipe off equipment after use. 
  • If you get sweat on a particular area of the floor, get a towel and spray to clean it up.
  • Out of respect for your fellow students, please maintain good personal hygiene when attending class. Wash your uniform between each class and keep it in good repair.  Get a second uniform if necessary.

Weapons

  • Do not touch any weapons you have not been trained on by a Shaolin-Do teacher.  
  • Return all weapons to their designated areas.
  • Please consider purchasing your weapons through our studio (see our Store page on the website). We get weapons at wholesale cost, so your purchase supports the school and we pass along some of those savings to you.

Equipment

  • The weight equipment in the back room belongs to Cypress Fitness and is generally off limits. Some exceptions can be made but you’ll have to discuss it with Sifu Brian.
  • Weights and other training equipment should only be used if you have received proper training for safety and form. Use at your own risk, and have a spotter when appropriate. 
  • Only use the kettlebells if you have been trained on them by one of our instructors. 
  • Iron palm equipment requires training and additional equipment fee.

Courtesies and Traditions

  • Address the head instructors as “Sifu.” 
  • Wear a clean gi to every class unless otherwise informed. 
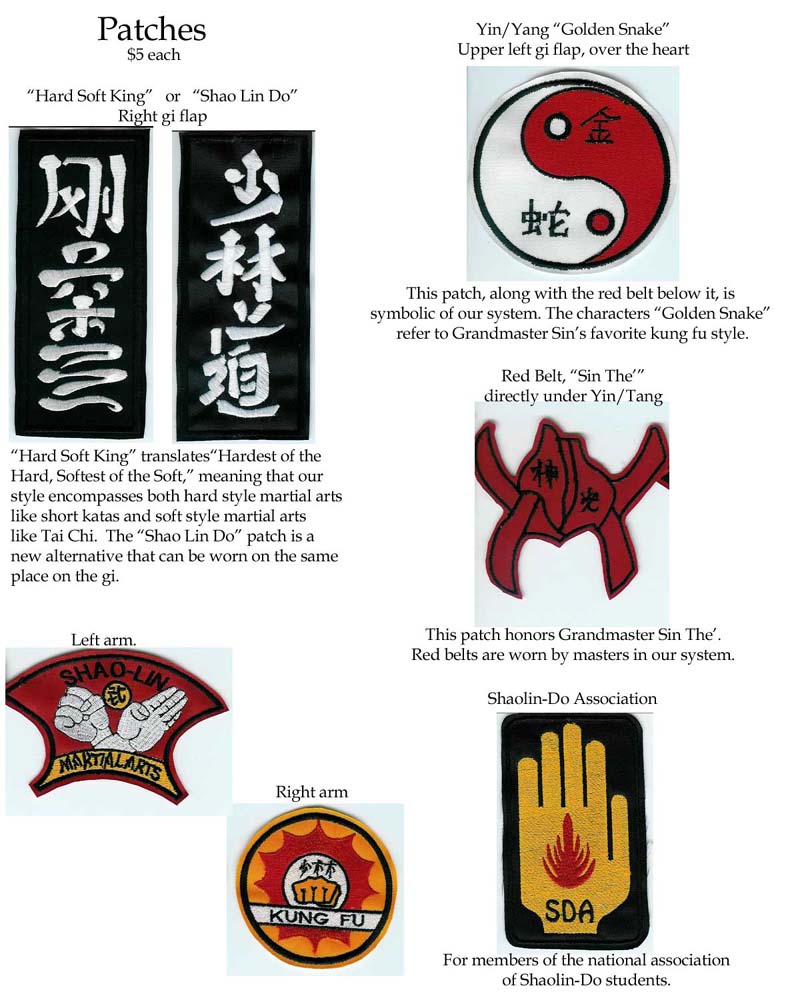
  • Have at least one patch on your gi to show your affiliation with Shaolin-Do. Click on the graphic for patch placement on the gi. 
  • Wait for an appropriate moment to ask a question -not in the middle of a workout.  Bow before and after as a sign of respect.
  • Never inform an instructor that you are ready for new material or to be tested.
  • Do not show any other student material unless you are expressly given permission at that time to do so. This applies to other members of your family.
  • Do not teach our forms to other people outside the school.  Do not lend/sell/give them videos of our forms or upload videos of forms publicly on the internet.
  • Pay tuition on time if not on automatic payments.  

Sparring

  • Sparring equipment must be worn by all students: shin/instep guards, hand gear, mouthpiece, and groin cup (if needed). Headgear is optional.
  • No Contact is allowed to the head, neck, throat, or groin (except light contact to protective gear).
  • No joint attacks (striking the elbows and knees) are permitted.
  • Students under black belt level may not spar without black belt supervision.
  • Light “TAG” contact is only allowed to legal areas if both students are wearing sparring equipment.
  • Acknowledge hits. To make sparring more realistic and to encourage our partners to use control, always pause to acknowledge if your partner gets an attack in on you. For example, if you just got side-kicked, don’t continue sparring as if nothing happened. 
  • No weapons sparring outside of class exercises.
  • Never spar at a higher intensity level than your opponent is comfortable with. By the same token, be careful in sparring because you will always reap what you sow.
  • When sparring, make your partner’s FUN and safety more important than winning.
  • Sparring is NOT a fight! It is a fun, playful game of give and take focused on increasing your skills. It is not about dominating or overwhelming another student. Keep calm and avoid going into a fight-or-flight panic state. This keeps you more aware of your surroundings, more self-possessed and in control of your actions.

Conclusion

These rules are reasonable and without need of explanation. I fully expect all students to follow these rules and upper belts (upper brown and black belts) to set the example. To ensure the continued high quality of our school and the good name of Shaolin-Do, upper belts must also help to gently remind the lower belts when they drift from these guidelines (like an older sibling might). As a lower ranked student, you should appreciate their advice because they are helping you to remain a good student in the school. If being a good student, martial artist and person are not your goals then you are at odds with the 1500 year old traditions and principles of Shaolin-Do.

Training at New Orleans Shaolin

The following section is to give you an overview of our system and curriculum. You should study it again at each belt level to make sure you understand what your focus should be.

I Chin Ching

Literally, “Tendon (or Sinew) Changing Classic” but possibly better understood as “Classic Material for Changing the Channels,” the I Chin Ching is a historical series of principles designed to transform the body and how it operates and connects. It intends to do this, primarily, by opening the channels and increasing and acquiring chi. As the chi develops, so does the health, vitality, strength, and efficiency of the mind and body. Since the body is the vehicle to enlightenment, the monks of Shaolin first adopted these principles into their practice to promote their meditation practice. Eventually, however, they realized they could use them to practice martial arts while changing its purpose from just fighting to spiritual development. Thus, the martial tradition of Shaolin was born and the I Chin Ching was established as its basis and origin. 

The exercises below are how the Shaolin monks manifested these principles to begin the process of change in the body and mind. They all use localized tension and a hissing, controlled breathing pattern. The emphasis, however, is always on building connections through the body, and maintaining equanimity while practicing them. In class we usually do 10 breaths for each exercise. Traditionally, they were held for 49 breaths!

  1. Clenched Fists – Stand straight, clench fists by your side. Tense on exhale, hold your strength on inhale.
  2. Palms Down – Stand straight, arms by sides, fingertips pulled up so palms face ground.  Keep elbows straight, pull fingertips up on exhale, hold tension on inhale.
  3. Palms Out – Stand straight, arms straight out to side at shoulder level with palms facing outward.  Keep elbows straight, pull fingertips back on exhale, hold tension on inhale.
  4. Squeeze Together – Stand straight, feet shoulder width apart, hands are in praying position with elbows up level with shoulder.  Pull hands apart on inhale (no tension), push hands together hard on exhale, concentrate on the center of the chest.
  5. Laughing Buddha – Feet wider than shoulder width, hands straight up with fingers pointing to the side, palms skyward.  Lock knees, bend back on exhale, stay there on inhale.
  6. Side Bend – Two parts, left and right.  Feet shoulder width apart, knees straight, arms straight with palms pointing to the side, bend to side on exhale, stay on inhale.
  7. Forward Fold – Feet together, knees locked, bend forward on exhale, try to touch elbows to floor, stay down on inhale.
  8. Forward Shoulder Drop – Stand straight, arms in front at shoulder level, palms facing floor. Inhale, drop shoulders while holding breath, relax and exhale, repeat.
  9. Wrist Curls – Stand straight, feet shoulder width apart, arms in front of chest with elbows touching.  Palms out, inhale as hands begin to make circle, close fingers to first joint, hold breath, pull hands in until knuckles touch chest, continue until elbows again touch, then exhale.
  10. Side Shoulder Drop – Stand straight, both hands to side at shoulder height with palms facing out to side, inhale. Hold breath and drop shoulders away from the ears, relax on exhale.
  11. One-Arm Forward Shoulder Drop – Two parts: right and left, just like #8, except one arm at a time.
  12. One-Arm Side Shoulder Drop – Two parts: Right and left, just like #10, except one arm at a time.
  13. Boat Pose (Upper) – Lay down on your back on exhale. Sit up at 45 degree angle, hands clasped behind head, and cramp stomach muscles. Stay 45 degrees on inhale and cramp on each exhale.  
  14. Boat Pose (Lower) – Lie down on back, hands clasped behind head.  Lift both feet together to a 45 degree angle and cramp stomach muscles.  Remain up on 45 degrees on inhale and cramp stomach on each exhale.
  15. Sideways Situp – Two parts, right and left;  lay down on your side for sideways sit-ups.  On exhale, raise to 45 degrees and cramp side stomach muscles. Remain up on inhale, cramp on each exhale.
  16. Locust Pose (Upper) – Lie face down on floor, hands clasped behind head. On exhale, raise chest off floor.  Hold chest off floor on inhale and try to raise up higher on each exhale.
  17. Locust Pose (Lower) – Lie face down on floor, hands straight behind you with palms on floor.  On exhale raise legs off floor as high as you can, on inhale stay in raised position.  Try to raise legs higher on each exhale.
  18. Forward Fold Shoulder Stretch – Stand straight, clasp fingers together behind back.  Bend forward at the waist, raise arms as high behind back as possible on each exhale. Draw shoulder blades together. Retain on inhale.
  19. Standing Twists – Two parts:  Stand straight with feet pointing forward.  First side, place left arm behind back with palm facing outward and right arm behind head with palm to the head.  Twist body to the left as far as possible on each exhale.  Second side, reverse.
  20. Infinities – Two parts:  First side, left hand in middle of back, palm out.  Fingers pointing to head.  Right hand goes back over right shoulder and clasps fingers of left hand.  Alternate pulling right hand on one exhale and left hand on the next.  Second side, reverse.
  21. Sage Marichi Pose – Two parts:  First part, sit down, back straight with legs extended in front.  Take right foot and place on floor outside the left knee, keep left foot straight.  Take left arm and reach around right knee and grasp under left knee.  Right hand is bracing you on the floor.  Twist body to the right as far as possible on each exhale.  Second side, exactly reverse.
  22. One-Arm Pushup – Two sides:  One arm push up in low position.  Straighten on exhale but do not push up all the way.
  23. L-Sit – Sit down on floor with legs extended in front of body.  Place palms on floor beside you.  On exhale, push arms to locked position raising body and feet off the floor.  Keep position on inhale and press harder on each exhale.
  24. One-Arm, One-Leg Pushup – Two sides:  One arm push up in low position, only one foot on the floor. Right hand with right foot and vice versa.
  25. Elbow Lever – Start in formal sit position, place palms reversed inside of knees.  Elbows will go into body, throw weight slowly forward until entire body is off the ground and supported by the palms. Straighten body out and do your exhale and inhale same as 1 and 2.
  26. Fish Pose – Sit down in cross leg position and lie flat on back with legs still crossed. Arch back, only head and feet touch the ground.  Arch back more on each exhale.
  27. Sissy Squat – Horse stance position.  Bend backwards and touch ankles with hands.  Bend back more on each exhale.
  28. Wrestler’s Bridge – Top of head and balls of feet touch ground with body arched.  Push with toes more on each exhale.
  29. Upward Plank – Sit down, place hands on floor behind you.  Lift hips so that hands and feet are all that touch the floor.  Arch more on each exhale.
  30. Calf Raise – Two sides:  Stand on one foot, push up on toes.  Stay there on inhale, push higher on each exhale.
  31. Pistol Squat – Two sides:  start all the way down with one leg extended, slowly, push slightly higher on each exhale.
  32. Head Stand – Clasp fingers together, place on ground.  Put head in hands and do a head stand.  Arch back more on each exhale.
  33. Crossed-Leg Boat Pose (Upper) – Lie down with crossed leg position.  Hands behind head, raise up to a 30 degree angle and cramp stomach on each exhale.  Maintain position on inhale.
  34. Sleeping Buddha – Two sides, lay on side.  Lift legs sideways on each exhale.  Maintain position on inhale.
  35. Bow Pose – Lie face down, reach back with hands and grasp ankles.  On exhale, pull with both hands and kick back with both feet.  This will arch back and pull chest off floor.  Maintain on inhale.
  36. Wheel Pose – Lie on back, push up with hands by shoulders with feet.  This will arch back and push stomach upwards.  Maintain on inhale, arch more with each exhale.
  37. Shoulder Stand – Lie on back, raise up until entire weight is on shoulders.  With feet straight up in the air, brace back with hands.  Press back and feet straighter with each exhale.  Maintain on inhale.
  38. Elbow to Knee – Two sides: Sit down in cross leg position.  Clasp hands behind head, twist body down to touch right elbow to left knee.  Reverse feet and twisting direction for next side.
  39. Head to Knee – Two sides: sit down, extend left leg straight out.  Place bottom of right foot as high into left thigh as possible.  Grasp left foot with both hands and pull with hands, touch head to knee and kick heel out on each exhale.  Maintain on inhale.
  40. Leg Behind Head – Two sides:  sit down, extend left leg straight out.  Take right foot with both hands, pull right foot up behind head on each exhale.  Maintain position on inhale.  Note:  Once leg is comfortable behind head, lean forward and grasp foot of leg that is straight out with same side hand and pull for more stretch.
  41. Single Leg Balance – Two sides:  stand on left leg. Grab right foot with right hand and, keeping both knees locked, stretch right foot as high as possible on exhale.  Maintain on inhale.
  42. Crow – Crouch down on balls of feet with palms on floor. Place elbows clipped to thighs, lean forward until you catch your balance and only palms are touching floor.  Maintain position on both inhale and exhale.
  43. Sideways Crow – Two sides:  lie on side with knees bent and pulled.  Put hands on floor in front of chest and stomach and press entire body off of floor with hands.  Press higher on each exhale and maintain on inhale.
  44. Single Leg Calf Raise – Two sides:  squat down.  Cross right foot over left knee.  Do calf raises with left foot.  Press higher on each exhale, maintain on inhale.
  45. Hand Stand Pushup – Stand on hands using wall for balance.  Do halfway down and back up handstand push up on exhale.  Let down on inhale.
  46. Plow Pose – Lie down on back, keeping legs straight and back on the floor.  Bring legs over body so that toes touch floor above your head.  On each exhale, press feet further back.
  47. Straddle – keeping feet pointed straight ahead, split sideways as far as possible.  Exhale on each press down, maintain on inhale.
  48. Front Splits – Two sides: place right foot in front and come up on heel so that toes point to ceiling.  Keep both knees locked and split as far as possible on each exhale.  Maintain on inhale.
  49. Single Arm Elbow Lever – Two sides:  Just like #25 except on one arm.  Note:  to get up you may use two fingers of the opposite hand to get balanced, then let go and stay on one arm.

Shaolin-Do Curriculum

After the I Chin Ching, the majority of how the Shaolin arts have been passed down over many generations is through the use of forms, or series of martial movements linked into a sequence. The Shaolin-Do system contains hundreds of forms originating from seven different temples in the Shaolin network. One of the major strengths of the Shaolin martial arts was the willingness to adopt new ideas and superior fighting methods, in effect creating a think tank or laboratory for martial arts to mix and mingle. This flexibility resulted into the most comprehensive collection of styles ever assembled and taught under one name: Shaolin.

Many martial artists may consider forms to be merely traditional or even obsolete. Properly used however, forms can be a valuable tool for learning fighting skills and gaining insights from generations of masters before us. 

Excerpt from Grandmaster Sin The’s book, Shaolin-Do: Secrets from the Temple:

  • Let us assume that there was a master who had developed fighting into a natural art. They do not need forms for their own use. But in order to teach their “style”, they need to teach their students to feel what they feel. So the master creates a sequence of moves to teach not only the fighting techniques, but to teach how it feels to move in a natural and flowing manner. Techniques alone can be absorbed rapidly, but to learn how to move naturally and effortlessly requires making the form a part of yourself. You must become one with the form.

So forms aren’t simply to learn to fight, we are learning to embody the spirit of a previous master, and to let that spirit flow through us. The end result of this being that we free our bodies from years of patterned holding and tension to make room for this flow of new movement. This is why we constantly practice new forms—to find new ways of being. 

When learning a form, we must go through this process:

  1. Memorize the movements. 
  2. Learn the immediately accessible techniques from the form. Every move has at least one purpose and an elementary understanding is often immediately discernible. 
  3. Keep practicing the form to discover deeper meanings and applications. Wrestling with the form to discover it’s hidden gems, whether originally intended or not, is how you make a form real to you. Remember, these forms aren’t meant to be interpreted as a linked string of moves against one person. Rather, they were developed to simulate full battles. Consecutive moves could be techniques against two different opponents.
  4. Forget the techniques. Thinking in terms of techniques slows the reactions and retards the flow. The form at its highest level teaches the feeling of movement which the creator wanted to convey.
  5. Practice with clear visualization of the scenario being enacted. This drills a situational response into the subconscious mind, so that when attacked the body responds without thought.

Learning a form puts the student in contact with the original master and thus should be treasured and treated with respect. This is why we begin and end each form with a salute or bow, to acknowledge that priceless connection. 

Forms are the heart and soul of the Shaolin-Do program.

Shaolin Kung Fu Program

Starting with Kung Fu is the traditional way to begin training in the Shaolin system. You move from harder style, focusing on self defense, to the softer, more precise arts.

The white through green belts are to learn to use your body forcefully for self-defense, discipline the body to get in better shape and withstand more pain, and create new neural pathways through the body using forceful movement. 

As a Brown belt, you are to start appreciating kung fu as an art form, rather than just for self defense. You are now strong, but you need to begin focusing on control; being able to turn the power on and off at will. The movements become more complicated and the memorization-based mental training becomes more challenging. 

Finally, as a black belt, you transition from being a student to a “disciple”. This is an extraordinary achievement that takes years of hard work… but it isn’t the end. It simply means that you are now a serious beginner. You have created a body and mind necessary to begin intensifying your training. You start to dig deep into certain styles you have previously only seen an introduction to, but now the focus opens up to include the softer styles of Tai Chi and other “internal” arts. The mental training switches to making movements fully conscious and efficient by slowing down and putting more focus and awareness into everything you do.

White Belt Focus

  • Mind/body coordination through repetition of techniques from the material 
  • Knowledge of joints and vulnerabilities of another human body through the application of self defense techniques

Yellow Belt Focus

  • Long Forms 
    • begin using your new-found body coordination to link together several of the techniques you learned as a white belt into a longer series. 
    • deep, strong stances
    • powerful strikes – imagine every strike in the form must break a board
    • intense concentration
    • overwhelming spirit during the yells
    • Concentrate everything on your current move, don’t move physically or mentally to the next move until the current one is completely finished.
  • Tiger style 
    • tiger claws stay active throughout the entire form
    • Strong but graceful
    • Keep a powerful spirit and overwhelm your opponent with forward movement and aggression 
  • Staff (weapons)
    • Be courteous, safe, and aware of your surroundings when using weapons
    • don’t muscle a weapon around, learn to flow the way they want to flow

Blue Belt Focus

  • Shaolin Bird Styles: 
    • move and land lightly with a playful feeling
    • each strike should jab out like lightning.  
    • Attempt to make each attack be “instantaneous”
    • Jumps are supposed to cover distance and you should land in the lowest position possible.
  • Nunchaku
    • Keep your hand between the nunchucks and your mouth at all times

Green Belt Focus

  • Introduction to Qi Gong – learning to connect mind, body, breath, and energy
  • Mantis/Monkey style in Luohan – springy but connected to the ground when you land

Advanced Curriculum

Congratulations! You have probably been training for a year or more now, and have graduated to the rank of brown belt. Brown and Black belts comprise our “advanced” students. Brown belt is broken into 3 levels, counting down to first degree black belt:  3rd, 2nd, and 1st (highest) brown.  Each belt level takes approximately 6 months of training.  At each level, you learn 5 forms for advancement. 

When Grandmaster Sin first started teaching in this country, he taught much less material from brown to black than we have in the curriculum now.  3rd to 2nd brown consisted only of broadsword and sanje, but still took 6 months, so brown belts did a lot of sanje, broadsword, conditioning, and short kata. Consider that when practicing and make sure you don’t neglect the color belt material.

It is largely up to you now to set standards for yourself as to what you would like to accomplish over the next one and a half years as you train for your black belt.  It’s time to do a little soul-searching and set some personal goals for yourself. Here are some questions to ask yourself to zero in on some goals:

  • What are the qualities, capabilities or attributes that make someone a martial arts master?  (Imagine things that you would like to be able to do or attributes that you would like to possess 20-30 years from now.)
  • What qualities, capabilities, or attributes would you possess 10 years from now, if you set out on this path today?
  • What qualities, capabilities, or attributes would you possess 1 year from now, if you set out on this path today?  Make these your one year goals, and be sure to write them down.
  • How do you plan on reaching your one year goals?  Break them down into 3 month increments, and keep track of your progress.  You can keep revising, if necessary, as you learn whether or not your goals were realistic, or too easily attained.

Now set a few concrete goals for yourself that you will attain before you test for black belt.  Some examples:

  • “I will be able to do one of the challenging I Chin Chings (like elbow lever, one-hand push up, pistol squat, front split, or side split).”
  • “I will be able to do fast and powerful front, side, roundhouse and hook kicks over my head.”
  • “I will be at my optimal body weight of _____ lbs.”
  • “I will be able to do all of my forms flawlessly, with low stances, power, snap, focus, and rhythm.”

This last one should automatically be one of your goals.  The other goals will be tailored to your individual priorities, abilities and desires.  Make a document somewhere to keep track of your progress and work consistently.

Feel free to contact me for advice in creating a plan to reach your goals.

Brown Belt Focus

  • Gaining a more in-depth knowledge of some of the main Shaolin animal styles: white crane, Shaolin bird, and tiger. You’ve already seen a brief introduction to these, but now, by practicing 3 forms of each style, you’ll spend much more time incorporating the style into your body and mind.
  • 3rd Brown: White Crane 
    • have a “proud” chest. The Tan Chung point at the center of the chest is the energy focus for this style. This point connects out to the arms. 
    • move in a staccato manner, snapping out kicks and strikes with lightning speed
    • When hopping, try to travel a good amount of distance, and when hopping onto one leg, completely stick the landing
    • stretch out as much as possible through the limbs for strikes and kicks (think: long wings)
  • 2nd Brown: Shaolin Bird
    • Cover a lot of ground with hops and stances
    • Make finger strikes and eagle claws with a very strong and activated hand
  • 1st Brown: Tiger
    • Keep lower back connected to the ground like legs are compressed springs. The tiger energy point is the Ming Men. You should “prowl” as you move.
    • Tiger claws should ALWAYS be firm.
    • Eyes should have an intense outward focus.
  • Weapons: Broadsword (dao), Sai, and more Staff
  • Maximizing body hardness through the San Ye Chuan form.
  • Advanced I Chin Ching to transform your energy system
  • Change your relationship to pain by intensifying your conditioning training and starting Iron Palm training

1st Degree Black Belt Focus

  • Black Tiger Style – same priorities as 1st Brown Tiger
  • Weapon: Spear
  • Belly-breathing – filling up the belly on an inhale and lightly contracting on the exhale. Practice so that it becomes a natural pattern of breathing. You can’t move on to active or daoist breathing until you’ve reached this stage. Daoist breathing starts at 2nd black so this has to be learned now.
  • Teaching the lower belts – we always say that you don’t understand something until you can teach it and explain it to a beginner. Help lower belts with their material to improve your own conceptual understanding of the material and to assist senior instructors.
  • Tai Chi – it’s time to become serious about tai chi training. This means you need to overcome the boredom you might feel by slowing down and not focusing so much on highly yang martial arts. 

2nd Degree Black Belt Focus

  • Hsing Ie (xingyiquan) – internal style derived from tai chi with emphasis on linear attacks and controlling your body’s midline
  • Weapon: Straight Sword – also an internal style meaning the sword should always be connected to subtle movements from the body, rather than being muscled around.

Tai Chi Program

Recommended at brown belt. Required at black belt.

Tai chi is an advanced martial art that requires being more attuned with your body and the present moment. Tai chi training at New Orleans Shaolin initially consists of learning principles rather than just forms, although we ultimately learn forms. These principles embody a completely new way of being and using your body, as opposed to just being a simple movement. You must stay relaxed, yet connected. Strong but not forceful. While the techniques for learning these principles are simple, the depth of them can never be reached. For this reason, we initially only learn one form, the Yang style 64 posture form. We start by learning the movements, and then begin the arduous task of filling those movements with the internal principles.

Curriculum:

White to Yellow Sash

  • Joint Loosening Exercises
  • Basic standing postures: Ready Position, Hold Ball on Left, White Crane Spreads Wings
  • 1st Road of the Yang 64 Posture form.

Yellow to Blue Sash

  • Yang style 64 Posture form
  • Pushing Hands Prep Drills

Blue to Green Sash

  • Posture Testing the Yang 64 form – have a partner apply pressure to each posture of the form
  • Pushing Hands (partner drills) – this is the beginning of Tai Chi sparring. 
  • Pa Kua Circle Walking

Green to Third Brown Sash

  • Classical 8 Section Pakua (baguazhang)
  • Jian (straight sword) basic exercises

Once you have learned the basic principles you will be able to learn many more Tai Chi forms for both empty-hand and weapons, including pakua (bagua), tai chi sword, hsing ie (xingyi), all derived from Tai Chi. These forms will allow you to continue exploring these principles with new expression and nuance. These other forms are also available as part of the Shaolin Kung Fu program once you get to black belt.

Iron Palm

Recommended at Brown Belt. Required before 4th degree black belt.

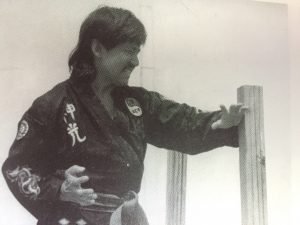
Iron Palm training involves striking a wooden post and bags of gravel, thrusting your hands into a bucket of dried soybeans, and rolling an iron bar on your arms and shins to harden up the body’s striking and blocking surfaces. It is an important part of our tradition, not only because our Great-Grandmaster Ie specialized in Iron Palm, but because it toughens your resolve and helps you develop focus and determination against the most difficult obstacles. Note that for Grandmaster Ie to have devoted his life to this training, he must have seen it as extremely valuable not just for martial application, but in terms of personal transformation.

It would be worth noting that the motto for the training is “If it doesn’t hurt, you’re not doing it right.” But your body adapts quickly, and you learn that it IS possible, through perseverance, to develop seemingly superhuman abilities.

Injury

The process of martial arts definitely puts a strain on your body. Ultimately though, as long as nothing is seriously wrong or painful, you should just consider it to be a manifestation of the change you’ll be going through. Often the weakest link in the chain is the first to go. Once that gets stronger, the next weakest link might give you some trouble. All you can do is rest as much as you can, identify the injured area with your inner awareness, and listen to your body. If something is seriously bothering you, don’t train, or just come to tai chi which is designed to nourish your body. If it’s just slightly aggravating, keep training and moving, and it will eventually work itself out. Some pain is good for you because you must endure it and not react to it too heavily, overcoming your aversion to being uncomfortable. In this way, you’ll learn to think of pain as a teacher.

If you become seriously injured and cannot train for an extended period, you’ll be learning to practice patience and self-control as you let yourself heal. But more importantly, the injury points you to an area of yourself that you were previously inefficiently aware of. This time can feel grueling, but don’t let yourself become upset, or anxious. This internal training is as much a part of the curriculum as the physical practice.

Shaolin-Do Belt Rank Material

The Shaolin-Do program is a structured program to keep you progressing through ever more complicated movements and martial techniques.

These are the techniques you must be able to perform with proficiency to move on to the next rank. The program is cumulative so you must be able to perform all past material as you progress.

White to Yellow Belt

Short Katas:

  1. Damo Enters the Gate: Block-punch, block down.
  2. Damo Sets the Rules: Block-punch, block down, block-punch, hit-kick.
  3. Guardian Shows His Might: Block-thrust, block-punch, hit-kick.
  4. Chop Down the Tree – Circle-block, grab and break, sweep.
  5. Giant Bird Takes Flight: Double kick.
  6. Avalanche on the Mountain: Block-punch, double back fist, big block, double back fist, hit-kick.
  7. Giant Bird Returns to the Nest: Circle-block, grab and break, sweep, back sweep, front kick.
  8. The Thunder Rolls in the Hills: (2 attackers) front kick, side kick, spin and side kick, other foot side kick.
  9. Wild Stallion Kicks the Gate: (4 attackers) front kick, front kick, side kick, other foot side kick.
  10. Ride the Stallion, Defeat the Enemy: Horse stand, block inside and punch, block outside and punch.

Sparring Techniques:

  1. Face punch.
  2. Cat stance, two hand and front foot attack.
  3. Jumping side kick, front kick, punch.
  4. Jumping front sweep, side kick, punch.
  5. Double back fist, jumping knee/roundhouse kick.
  6. Jumping back sweep, front kick, punch.
  7. Cross-step hook kick.
  8. Jumping front sweep, grab, punch.
  9. Jumping side kick, block down.
  10. Grab, jump, chop/knee.

Self Defense: (attack: defense)

  1. Pull on the wrist: elbow solar plexus, knee, punch face.
  2. Push chest: step back, block, pop, grab, knee.
  3. Grab from behind: bend forward, stomp, step around, stand up, hammer, throw.
  4. Wrist twist: step in with opposite foot, straighten arm, pull hair, chop throat.
  5. Pick up from behind: kick shins or knees, hammer groin, headbutt.
  6. Full nelson: push up forehead, stomp, step around, stand up, hammer/elbow, throw.
  7. Choke from the front: chin down, step back, punch solar plexus, block, pop, grab, knee.
  8. Hair from the front: hold the hand, bend down, snap kick.
  9. Hair from behind: 
    1. Grab the hand, twist under, kick. 
    2. Grab the hand, back kick.
  10. Headlock: bite the side, elbow kidneys, grab, hammer/chop.
  11. Grab the uniform:
    1. “Quick and dirty”: blow/spit to face, slam across, back fist face.
    2. Straight-arm joint lock.
    3. Bent-arm joint lock.
  12. Elbow lock: bend arm, elbow solar plexus, knee, punch face.
  13. Hammer lock: 
    1. Free shoulder: step out and back kick.
    2. Trapped shoulder: step out, spin, back fist, wrap, punch, knee.
  14. Choke from behind: chin down, step forward, elbow over arms, punch.
  15.  Crushing handshake: make a “v”, break thumb, elbow and back sweep.

Yellow to Blue Belt

Short Katas (#11-15):

  • Climb Up the Mountain: 3 hit-kicks.
  • Dance of the Tiger: Elbow and punch, turn, back fist, stomp, kick.
  • Comet Out of the Eastern Sky: Block while stepping back 45 degrees to Reverse Bow, back inside crescent, front kick, thrust.
  • Lightning Precedes Thunder: Block while stepping back 45 degrees to Reverse Bow, front outside crescent, side kick.
  • The Mighty Tree is Felled: Step out and block, grab and break, sweep, trap, side kick.

Ippong (weak = outside of the body, strong = inside):

  1. Weak-side punch.
  2. Strong-side punch.
  3. Weak-side chop, punch.
  4. Strong-side chop, punch.
  5. Weak-side side kick.
  6. Strong-side front kick.
  7. Elbow break, strike with elbow.
  8. Weak-side front kick.
  9. Strong-side double kick.

Staff Swings:

  1. Reverse figure-8.
  2. Forward figure-8.
  3. Center spin.
  4. Two-handed swing.

Long Forms:

  1. Se Men Tao Lin (Four Doorways Connected).
  2. Fei Hu Chu Tung (Flying Tiger Comes Out of the Cave).

Self Defense (#16-20): (attack: defense)

  • Finger Break:
    1. Low: pull both hands and knee groin.
    2. Middle: kick one leg over one arm and kick the groin.
    3. High: step back, roll the top arm to elbow up position, squat to Horse forcing them down, punch.
  • Arm Bar Choke: pull arm down, turn chin into crook of arm (bite), stomp foot, step around to the side the choke is coming from, lay the attacker back with top arm and strike groin with other.
  • Locked Wrist Push from Behind: wait until forward foot matches locked arm, spin, back fist.
  • Arm Bar Come-Along (palm up): hit wrist upward to Bird’s Beak the eyes while sweeping, punch temple.
  • Double Wrist Grab: step back with one foot to Horse, pull away lead hand, back fist.

Blue to Green Belt

Short Katas (#16-22):

  • Damo Dismounts the Stallion: Block-punch in Horse, chamber-punch in Bow, block-punch, block down.
  • Chase the Ten-Thousand Soldiers: Block-punch in Bow, step up, chamber-punch, step to Bow, block-punch.
  • Tornado Sweeps Away the Empire: Block-punch in Bow, twist attack, chop, sweep, front kick.
  • Ride the Horse, Deliver the Message: Block-punch in Horse, T-block rake off, hit-kick, hit-kick.
  • Damo Breaks the Rules: Block-punch in Bow, front hand back fist, back hand back fist, block down and front kick.
  • Avoid the Spear, Send a Warning: Jump back to Horse and block down, slide to Cat and block-upper-cut.
  • Prevent Disaster, Deliver the Message: Jump forward to Horse and block down, shift to Bow and block-upper-cut.

Sparring Techniques (#11-15):

  • Block, back hand punch.
  • Block, back hand punch high, drop down, back hand punch low.
  • Front hand block out, 3 punches, block down and kick.
  • Slide to Cat, side kick, front kick, block out, 3 punches.
  • Inside crescent, spin, side kick, block out, 3 punches, block down and kick.

Self Defense (#21-25): (attack: defense)

  • Single Wrist Grab: 
    1. Cross Grab: one hand presses their grab, chop through wrist with grabbed hand. 
    2. Same Side: press grab, raise open hand to grab wrist, spin them over, lock elbow with your elbow.
  • Wrist Lock with Fingers Facing You: roll elbow to chin, knee groin, slam elbow down in their arm, back fist.
  • Arm Bar (palm down): hit wrist downward to Bird’s Beak groin, punch head with free hand.
  • Hammer Lock and Head Lock: same as #17.
  • Finger Break: pull hand upward and out of hold, Bird’s Beak to eyes.

Street Techniques:

  1. Block outside, twist arm down, kick head.
  2. Inside block, back sweep, punch.
  3. Outside block, turn and block, hook kick groin.
  4. Outside block, turn and block, grab wrist, elbow, dead hand, hit head and back sweep, kick head.
  5. Outside block, side kick knee, 2 chops.
  6. Boxer Attack: cross block hands, scissor chop throat.
  7. Roundhouse Punch Attack: step in, double forearm block, back fist temple.
  8. Shirt Grab Attack: cross-hand hook wrist, twist and bend hand, dead-hand ribs, chop head.
  9. Low Knife Attack:
    1. Right on top block, pull-in, knee.
    2. Left on top block, throw down.
  10. High Knife Attack: 
    1. Left on top block, twist, pull hand into stomach.
    2. Right on top block, grab wrist, shoulder lock.

Long Forms:

  1. T’ai Peng Sin Kun (Giant Bird Spreads Its Wings).
  2. Chu Chi Gun Se (First Level Staff Form)

Nunchaku Swings:

  1. Horizontal.
  2. Vertical.
  3. Forward Figure-8.
  4. Reverse Figure-8.
  5. Under Arm Snap.
  6. Diagonal Strike.
  7. Catch Under Opposite Arm.
  8. Double 8.

Green to 3rd Degree Brown Belt

Short Katas (#23-30):

  • Mountain Crumbles Into the Sea: Block-punch to Bow, 6 back fists, block down and front kick.
  • Stampede Overcomes the Herder: Block-punch to Bow, back fist, shuffle forward, back hand back fist and back fist rehit, shuffle forward and front hand back fist.
  • Damo Refused Entry to Shaolin: Block-punch to Bow, twist attack, chop, front sweep, back sweep while horiz. punching, stand up, block groin and front kick.
  • Hui Ka Makes a Sacrifice: Block-punch to Bow, grab with front hand, break elbow with back hand (finger tips down), round house kick.
  • While Carrying Wood, Avoid the Avalanche: Block down to Monkey, step out to Bow, punch forward and back, block with both forearms in Horse, block-punch to Bow, hit-kick, hit-kick.
  • While Carrying Wood, Sidestep Disaster: Block down to Monkey, step out to Bow, punch forward and back, block high and low to Cat, block-punch to Bow, hit-kick, hit-kick.
  • Vicious Rumors are Spread: Step back and elbow down, palm up punch, shift to face forward in Bow and palm up punch, slide back to Cat and block-punch with back hand, forward hand block-punch to Bow, step and block-punch to Bow.
  • Damo Accepts Hui Ka as his Disciple: Step back and elbow down, palm up punch, step forward to Sparring stance, tornado kick, kata #18, block-punch (no block-punch on 2nd side).

Sparring Techniques (#15-20):

  • Jumping front sweep, spinning hook kick, back fist, round house kick.
  • Back foot knee-trap and round house kick, punch, step up, step out to punch.
  • Jumping hook kick the knee, spinning hook kick, back fist, round house kick.
  • Sparring techniques #9, #9, #10.
  • Jumping hook kick the knee, back fist, round house kick, punch.

Self Defense (#26-300: (attack: defense)

  • Cradle Lock (not severe yet): slam wrist up over your shoulder while front sweeping them.
  • Cradle Lock (severe): block by thrusting free hand through lock and laying out the attack.
  • Two Hand Pull to Wrist: step with same side to Horse stance to shorten the distance, use the free hand to punch, knee groin.
  • Low Head Lock: reach to grab head with back hand, front hand grabs their knee, flip them, slam the groin.
  • Two Hand Shirt Grab: cross step and cross the same arm through both of their arms, spin, back fist.

Long Forms:

  1. BeiHuang Ch’kKai Pang (Northern Beggar’s Stick)
  2. LuoHan Chuan (Fist of the LuoHan) – beginning Praying Mantis form

Nunchaku Swings:

  1. Blue Belt #3 plus #8.
  2. Ten combinations.
  3. Between the legs.
  4. Under knee catch.
  5. Wheel attack.
  6. Behind back, under same arm catch, Blue Belt #5.
  7. Catch around back under opposite arm.
  8. Around waist catch.